
Pioneer CDJ-1000MK2 Blue LED Modification Different from others...
Submitted by LeadThis content is © 2005-2025 The DJResource
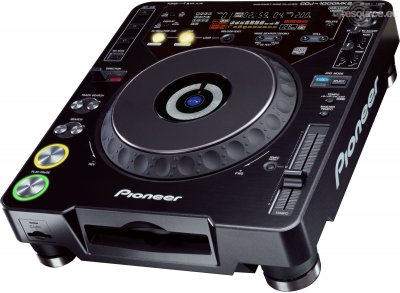
Pioneer DJ - Player Tabletop Overview
Gearbase product details : Pioneer DJ CDJ-1000MK2
Changing Play button LEDs
In this article I will be explaining how I changed the default green LEDs for the Play/Pause button by blue ones, like the Pioneer DVJ-X1 (and the later DVJ-1000).
This is not a step-by-step listing of every action I did, if you follow along you should be able to fill in the blanks. Some soldering and opening of players is involved so you will understand that by doing things like this you will void your right on warranty.
Where did the idea come from
This mod was suggested by Nightmoves in this Forum thread. 'Is it possible to change lights of the cdj 1000mk2's start/button to those of the dvj. Would be cool to change it, since I'm just a sucker for the dvj's blue lights.'
This was an interesting idea so I went on a search and discovered that the blue LEDs of the DVJ can be swapped. In an ideal world you should also adjust the load resistors, but I settled for slightly dimmer illuminations than changing SMD resistors.
Just for Fun
There is no real practical use or advantage to gain by doing this mod. The only thing it brings is a much nice illuminated ring around the Play/Pause button.

Opening the CDJ
Be careful when opening the CDJ-1000MK2, do not put the top directly on the table to avoid scratches and damage. Instead put it on a towel or any other soft surface, preferably you need some foam supports.
You will need a small Philips screwdriver to remove the 3 screws on the back and all the screws on the underside. Take care to sort the screws so you know where they belongs when you will be reassembling the player.
Part List
Part number : SLR-343BBT
Description : D4207 - Blue LED
Price (in 2005) : € 7,- / piece
4 of these are needed
Changing the LEDs
When you've unscrewed the bottom side of the CDJ1000MKII, you can open the backside like a book (when the slot-in is towards you). You will see in the control panel that holds the Play/Cue and search buttons in the bottom right corner. Look for the section that holds the Play Button LED's, like shown here.
In the red circle you see the section where the LED's are mounted. Their exact location is clearly printed beside the mounting points on the circuit board..
The parts to be replace in the CDJ are D1305 ~ D1308 (SLR-343EBT). First de-solder the LED's, than remove the circuit board and replace the LED's. Use the welding torch shortly (max 3 seconds per joint) so you don't overheat the LEDs or burn the circuit board!

Finished Result
It looks really good, especially in a darker environment. For such a relative easy job a very nice result.


Transparent LED's
 Here is some more info about LEDs: LED is short for Light Emitting Diode.
A LED is a diode, an electronic component that only allows a current to flow in one direction. A LED consists of a piece of semi conducting material impregnated with impurities that create a structure called a p-n junction. While the current flows through the junction there is energy loss in the form of light.
The wavelength (so the color) of the light is determined by the type of p-n junction is used. The outer epoxy shell around the p-n junction can be fitted with a lens-like top that can bundle the light.
The color of the epoxy shape of the LED has only little influence to the color of the light which the LED emits. Nowadays most LED's are made of transparent epoxy so without powering them it's hard to tell the color
This type of component is used in lots of gear and equipment, it's the most affordable and reliable solutions to create light in the darkness. And besides this, the LED is also used this much because of it's efficiency.
What do you think about Pioneer CDJ-1000MK2 Blue LED Modification ??
Gearbase

Please consider making this website possible by disabling your Ad Blocker.
Or become a Gold Member, they don't see ads.
There are 16 Comments


Saw the question was asked earlier, but no-one responded to it.
Moet je van kleur veranderende ledjes erin doen:D
Wel zonde van je cdspeler als het mis gaat![]() :P!
:P!

Please consider making this website possible by disabling your Ad Blocker.
Or become a Gold Member, they don't see ads.
Some parts of this website require you to login. Using an account on DJResource has a lot of advantages such as:
Adding Content, getting Notifications, Like content, Downloading and Uploading Images and much more.
Create your account to get involved with the Community
Most visitors online this month : 1.134
Lifetime Pageviews since 2003 : 245.814.387