
Pioneer CDJ-1000MK2 DVJ Jog Modification Just a little tweak for the looks
Submitted by LeadThis content is © 2005-2025 The DJResource
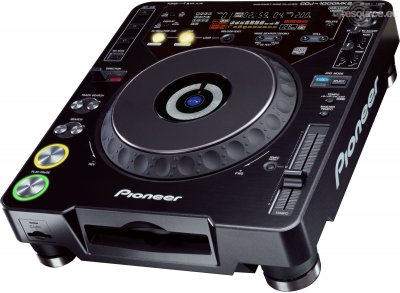
Pioneer DJ - Player Tabletop Overview
Gearbase product details : Pioneer DJ CDJ-1000MK2
Opening a CDJ and change Jog Plate
In this article I will be explaining how I changed the default Jog Plate (top of Jog wheel) of a CDJ-1000MK2 with the more metallic looking one from the Pioneer DVJ-X1.
Also you will see how the inside of a Pioneer CDJ looks like.
Some soldering and opening of players is involved so you will understand that by doing things like this you will void your right on warranty.
Where did the idea come from
This modification was done as a reply to a question that was mentioned in the DJResource Forums by jordy in This Forum thread. Jordy raised the question if it was possible to replace the touch-plate of the CDJ-1000mk2 by that of the DVJ decks.
The reasons you could have for this might be that the standard looks of the CDJ is to regular for you. Or you might prefer the metallic finish of the DVJ platter more than the more vinyl-feel of the CDJ-1000's
Just for Fun
There is no real practical use to gain by doing this mod. The only thing it brings is a much nice metallic platter on your CDJ instead of the standard black one.

3 Parts to replace
The actual modification is the replacing of three parts of the Jog wheel Assembly from the CDJ-1000MK2 with the parts ordered.
You could get away with ordering just the jog plate and reusing the parts that are already in the CDJ (Jog Plate and Jog A).
The Jog Wheel is one of the most complex parts of the CDJ and exist out of 60 parts and 27 screws, not counting the unit that gives you the 'feel' and the display. You do not have to remove them all one by one for this mod though.
The three parts that need to be replaced are the Jog Plate (DNB1126) off course, this is the plate you touch when using the Jog Dial. It is stuck with glue on a black base panel (Jog A DNK4172) and removing it is very difficult, I just replace it and the center panel by new ones.
In the center of the Jog is the transparent plate behind which the Jog Display sits. I do not recommend to try to re-use this as it would ruin the looks.
Parts List
Part number :DAH 2182
Description :Jog Panel (CDJ-1000MK2)
Part number :DNK 4172
Description :Jog A (CDJ-1000MK2)
Part number :DNB 1126
Description :Jog Plate (DVJ-X1)
Total cost around € 85 (in 2005)
How does the inside of a CDJ look like ?
This was a question on our Forums that can be answered easily. When I needed to replace the Platter Plate I had to open the CDJ anyway so taking a picture was quickly done.
Although the bottom section (big image) didn't need to be opened for the modification it was only a few screw extra to remove.


Disassembling the Jog Wheel
To get access to the Touch Sensitive section most of the Jog Wheel had to be removed and disassembled. This is a very precise job and shouldn't be done in a rush.
Turned the CDJ upside down and removed the back panel like in the picture above. It folds open like a book when you have the slot-in towards you. Be careful not to damage the display, use supports and NOT lay the CDJ on the Jog Wheel while working on it !
Remove the necessary circuit boards and flat cable until you can unscrew all the screws of the Jog Wheel assembly.
Unscrew the guides that hold the Jog Wheel on it's place. You should now be able to remove the Jog Plate. Look at the difference between the original Jog Plate (bottom right) and the new one (top left). The jog looks simple this way, but it's a surprisingly clever principle.

Assembling the Jog Wheel
Take the Jog A panel and the Jog Plate. Remove the protective layer on the bottom side of the Jog Plate, this reveals a sticky layer.
Stick the Jog Plate centered on the Jog A panel.
On the inside you need to stick the Jog Panel, use special care with this one, one out of center you cannot correct anymore.
The Result
After an endless session of unscrewing all parts, the Jog Wheel could be replaced. And all screws and parts can be assembled again. The final result is very cool, I love the metal feel of the DVJ's Jog wheel.


What do you think about Pioneer CDJ-1000MK2 DVJ Jog Modification ??
Gearbase

Please consider making this website possible by disabling your Ad Blocker.
Or become a Gold Member, they don't see ads.
There are 10 Comments
 heb zin in de herfst
  rond die tijd heb ik het geld er wel voor bij elkaar gevonden
Nee de buitenrand is hetzelfde gebleven, alleen de plaat aan de bovenkant van het jogwheel is vervangen.

These parts can be ordered at any official Pioneer Service Center.


Some parts of this website require you to login. Using an account on DJResource has a lot of advantages such as:
Adding Content, getting Notifications, Like content, Downloading and Uploading Images and much more.
Create your account to get involved with the Community
Most visitors online this month : 1.134
Lifetime Pageviews since 2003 : 245.809.828