
Freefloat Tweaked ! Stabilized by foam
Submitted by LeadThis content is © 2004-2025 The DJResource
What is a Freefloat
A Freefloat is an inflatable device that you place under your turntable to prevent audio feedback loops. More information about the Freefloat Turntable Stabilizer can be found in this topic on our website.
Why tweak it
I wanted to prevent the wobbliness these things are known for. As everybody that used Freefloats before knows it gives you a wobbly feeling. Scratching is nearly impossible and each time you touch the platter of the turntable for a pitch-bend, the whole turntable wobbles.
The proper way according to the manual is to use the Freefloat is almost half-deflated for best performance, but that also increases the 'wobbliness' of the Freefloat.
How does the idea came up?
There was a posting on our forum that was made by michelvandebeek mentioning that Peter Gelderblom solved this issue with foam. Peter meant with foam the inlay of a turntable flightcase.
I let my imagination ran a bit wild and I used construction foam ( in Dutch: purschuim) to make my own solution.
This is not a serious solution to the problem, the solution would be to just remove the Freefloat from the booth and talk to a proper sound engineer and stage builder.
Basically this is something new I came up with... and it works (well... sort of  )
)
Tools Required
The tools that I used to make this tweak is shown on the right. Besides a Freefloat you only need a few other tools. A saw, hammer and pencil is needed to make the box that determines the shape of the foam.
A can of foam ('Purschuim' in dutch) is also needed off course (used a complete can, can be done with much less)
Freefloat, use a new one and check for leakage
Construction Foam, I used full can but can be done with less
Pencil, or any other marking tool of your liking
Hammer, nails remove quicker than screws
Saw, cutting wood, electrical saw can be used if available
Construction Foam, to make the mold
Crowbar, used to salvage the wood needed

Create a box
The first thing to do is creating mold that is slightly larger than the Freefloat, it must also be at least as deep as the Freefloat is high. When the foam dries it will expand and you want something to constrain how it expands.
When expanding the foam is quit some force so you need to make sure the box is rigid enough to withstand that.
The material you use to create this box is free to choose, I used wood because you can saw and nail this very easy.
By making a frame that is closed off on one side, the only way the foam can expand is to the top.

Cover box with foil
To prevent the foam from sticking to the box so it needs to be covered in some way.
The easiest way to prevent the foam from sticking to your shape is to cover it all up with thin plastic foil. When covering the box, let the seams of the rows of foil overlap.
It is not necessary to use tape to hold the foil together, this will be done by the pressure that the foam creates while drying and expanding.
When the foam becomes hard it's fairly easy to strip of all remaining's of the foil. For the working of it all there is no need to remove these remainings.

Apply the foam
When you are ready with the thin plastic foil you're ready for the big job : using the foam. This is also the most fun part of the job.
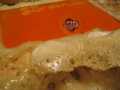
Evenly spread the foam in the box, not directly putting it to the Freefloat because once this foam touches something it will be very hard to remove. That is also the reason why you see these small parts of black stage-tape in the center part of the Freefloat. I wanted to protect the logo from being covered by foam if it would expand to much.
Because I wasn't exactly sure what and how the foam would expand I placed this on top of the branding logo of the Freefloat. Afterward I found this to be not necessary.
It's more important to apply the foam to the outside of the Freefloat than the outside of the box you've created. The foam that sticks to the Freefloat gives it's stability. The foam to the outline of the box only gives a cosmetically nice look when all foam is hardened.
Keep the Freefloat during applying the foam on it's place with your hand. It can be easily moved and than it's all messed up. The foam works very easy and can be applied with one hand, you can use your other hand to hold the Freefloat.

Pressurize during drying
The foam will expand when curing, the box will keep all pressure in a square.
As the Freefloat is relatively soft the foam might expand and compress the Freefloat.
To make sure the Freefloat keeps it's shape I've put pressure on it during the drying process to force the expansion of the foam to the top
After curing this can easily cut by a hobby knife to make the bottom flat.
Let the foam dry/harden for 24 hours

Finished Result
Damn, it was not easy to make a picture of such an ugly thing that looked somewhat decent.
First get the thing out of the box, you might need to carefully break some of the planks of the box. After that remove the plastic foil from the outside, it will peel of pretty easy in most places.
Then cut the foam away from what will be the bottom, make sure you cut straight.
And this is what the Freefloat Stabilizer looks like when it has dried and the thin foil is mostly removed from the foam.
Off course you could now unleash your creativity and spray paint it in the colors you like... just don't put paint on the Freefloat, hit the foam only.

Does it work ?
It does help preventing the wobble during use, but it decreases the max SPL it can handle compared to unmodified version.
Back then no SPL meter was available so testing was a bit hard. I used my custom 12'' Syrincs BM 12B subwoofer powered by a Mackie M*1400 amplifier to push out the SPL. The amplifier should send up to 1400Watts (subwoofer was connected to the bridged output of the amplifier), which should be roughly 94dB as I couldn't open the amp all the way (both the tweaked and unmodified version).
The real test started when I wanted to do some mixing on the test setup for the wobbliness. When you touch the decks you'll notice a difference directly. The 'foamed' Freefloat is much more stable and easy to handle. Also when doing some scratches it could handle much more than the original Freefloat. Overall it gave a workable use of the Freefloat, giving much less wobble while still decently removing the audio feedback.

Final Verdict
Better handling : Yes, pitch corrections and scratches a easier when modified.
Better sound isolation : No, the tweaked version could deal with around 3dB less SPL before audio feedback kicked in.
The foaming gives you much more stability, but can stand a little less bass pressure. I would definitely prefer stability over that bit extra pressure it could handle.
Recommended : Only when you are not bothered by the ugly foam, it works but surely doesn't look cool.

What do you think about Freefloat Tweaked ! ??
Random Images
Please consider making this website possible by disabling your Ad Blocker.
Or become a Gold Member, they don't see ads.
There are 10 Comments
Volgens mij creeer je door die purschuim weer een grote oppervlak wat kan trillen, kijk voor thuis is het leuk, maar voor in een discotheek met zware apparatuur, zijn de trillingen gewoon veel zwaarder.
Volgens mij scratch of geef je je plaat toch echt te hard een zet/versnelling.
Ik en onderhand alle andere djs hebben baat bij een freefloat en dus nergens last van.
Je zou miss je draaistyle kunnen aanpassen, door wat liever voor je plaat en platenspeler te zijn.
Draai je plaat bij op je logo, ipv aan de tafel van je platenspeler.
Maar succes met je FoamFloat
Groeten Dj Funky V
 ??
??Maar het werkte wel, het maakte de Freefloat een stuk stugger waardoor hij ietsje minder bass kon hebben, maar hij maakte het draaien vele malen beter te doen

Ik moet zeggen het idee komt over ..
Jammer dat het er een beetje uit ziet als een gebakje

Greetz

Some parts of this website require you to login. Using an account on DJResource has a lot of advantages such as:
Adding Content, getting Notifications, Like content, Downloading and Uploading Images and much more.
Create your account to get involved with the Community
Most visitors online this month : 699
Lifetime Pageviews since 2003 : 244.177.406