
Pioneer DJM-600 Fader Replacement Tutorial how you could do this yourselves
Submitted by LeadThis content is © 2004-2025 The DJResource
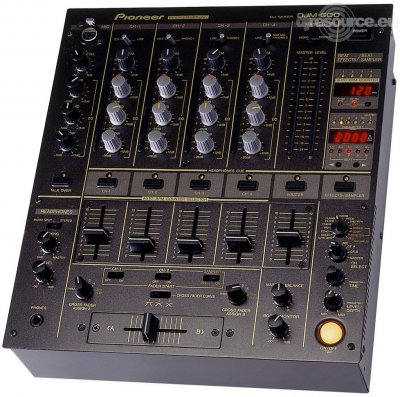
Pioneer DJ - Mixer Overview
Gearbase product details : Pioneer DJ DJM-600
Faders wear out
Faders are just like tires from a car. No matter how good they are, once every so much kilometers you're tires ware off and you'll need to replace them.
The DJM-600's faders are very easy replaceable if you know what you need to do. The following is a guideline how to do a proper replacement. This should only be done when no warranty is valid and by people that have some kind of technical knowledge.
Fader Replacement
When ordering faders remember : Each channel has it's own part number for the Fader Assy. This is because the PCB (Print Circuit Board) that comes with the fader is different for each channel.
Each part is different, CH1 and CH2 need additional wires for the faderstart and are mirrored from each other. CH3 and CH4 are also mirror from each other, needing less wires in the flatcable.
These faders could also be ordered as single part (DCV 1010) without the PCB part, but it only saves you a few Euro's and costs you a lot more time to replace. It is most cost and time efficient to replace the complete Fader Assy
Part List
Main Assy (Master) :DWG 1520
Channel 1 :DWG 1521
Channel 2 :DWG 1522
Channel 3 :DWG 1523
Channel 4 :DWG 1524
Remove Fader Caps
Begin by pulling off all the 5 fader knobs. When pulling straight vertical from the mixer they come of easily, if not wiggle a little bit.
You can wash the knobs with water and soap if you want to, just let them dry for some hours before you put them back.

Remove the Fader Panel
Unscrew the 4 screws to loosen the Panel that covers the fader area. The 4 blacks screws are located in the corners of the Panel, in this image there are red circles around them.
Once all the screws are loose and removed you can lift the panel off.
Watch out for the black felt at the back of the Fader Panel, keep it in it's place. This felt is there to keep dust out of the faders.

Prepare the new Fader
Open the lock on the fader PCB so you can insert the flatcable later a bit easier. The lock on the connection terminal that makes the final connection to the flat cable inside the mixer is closed when it leaves the factory.
You have to open it first. Just pull at both sides at the same time directly and straight from the component like the arrows indicate on the image.

Unscrew Fader Assy
Each fader is held in it's place by 2 gold colored screws that are located at the top and bottom of each fader.
The rings on each screw are a protection so that the fader lasts longer. These rings absorb most of the force that usually comes to the front and bottom part of the fader when moving it up and down.
This way the force that is used on the fader is directed into the chassis of the mixer and not to the top and bottom of the Fader itself.

Slide Assy out of place
Follow the direction of the arrows. By first moving the fader to the side, then pulling it up you can remove the fader.
This example only shows the movements for the fader of Channel 1 but this is the same for Channel 3 and the Mains fader. Faders 2 and 4 move first to the left and than upwards.

Disconnect and Remove Fader
When you've got the fader out of it's position you can open the lock of the fader and pull the flat cable straight out.
This should go very smooth, if you feel some sort of resistance you probably haven't opened the lock on both sides or you might not have opened it enough.

Faderstart Channel 1 + 2
The faders for Channel 1 and 2 both have Fader Start so they need a special arm to activate this. When you move the fader out of the 0 position this little black plastic arm slides out of the range of the optocoupler to transform the movement of the fader into an on/off switch for the Fader Start.
You see the opto-coupler as a black U-shaped part on the PCB. By using the electrical way instead of a micro-switch you don't feel a click when the fader is opened and closed.
You need to remove these from your old faders if you put them on the new once because these are NOT included when you purchase a new fader.

Insert and secure Flat Cable
You have to do this very carefully. If you do this the first time right it saves you lots of trouble. The wires from the flat cable are not massive so you bend them quit easy.
The holes in the connection terminal on the Fader Assy are just the right size, using to much solder will make it almost impossible to get it right again without ordering a new flat cable.
When the flat cable is on it's place you can close the lock of the connection terminal on the Fader Assy to make the connection completer.

Change the other Faders
If needed repeat the last 4 steps for the other faders.
What do you think about Pioneer DJM-600 Fader Replacement ??
Gearbase

Please consider making this website possible by disabling your Ad Blocker.
Or become a Gold Member, they don't see ads.
There are 3 Comments

Mijn DJM 600 is van 2001 en mijn fadersnummers zijn niet hetzeflde als in deze topic weergegeven. Ik heb :
master DWG-1521 --> 124k
CH1 DWG-1521 --> 123k
CH2 DWG-1522 --> 123k
CH3 DWG-1524 --> 123k
CH4 DWG-1524 --> 123k
Zou ik deze nummers respecteren om te bestellen of zou ik de nummers hierboven vermeld bestellen ?
Vriendelijk bedankt.
Psylo
Some parts of this website require you to login. Using an account on DJResource has a lot of advantages such as:
Adding Content, getting Notifications, Like content, Downloading and Uploading Images and much more.
Create your account to get involved with the Community
Most visitors online this month : 1.134
Lifetime Pageviews since 2003 : 245.821.367