Technics SL - Opening the Hood Step by step description
Submitted by LeadThis content is © 2007-2025 The DJResource
Opening the Top Section
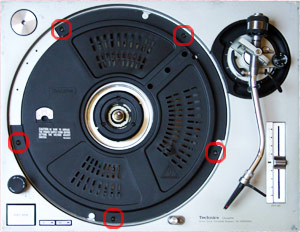
First remove the Platter. Pull with 2 hands at both holes straight up. If it seems stuck, keep applying upwards force with one hand and tab the center pin gently with the back of a screwdriver. Now the Platter will pop off to expose the cover of the brain of the SL1210MK2.
There are 5 black screws holding the cover in place, remove them with a small Philips screwdriver. When they are removed you should be able to lift the cover out of it's place. If the deck is old and heavily used it will probably stick a bit.
In the DJ Topic Technics Direct Drive Principle you can find a more detail explanation of the circuit board that's hidden underneath. That section will also go into detail of all electronics and functions that are located on that circuit board.

Place the SL1200 upside Down
Before you turn the turntable upside down you need to remove everything such as:
Counter Weight
Headshell (not really necessary, but you can't be to careful)
45 RPM Adapter
Dust cover (lift it out of the hinges)
Then Lock the Arm in the Arm Rest
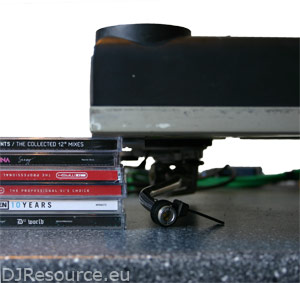
I found to get the perfect height I placed 2 stacks with each 6 CD's on the desk and put one on each side (left/right).
Then turn the SL around and place it upside down on the stacks of CDs. Place in such a way that the SL rests with flat surfaces on the CD's. The mounting of the tonearm should NOT touch the desk.

Opening the Bottom Section
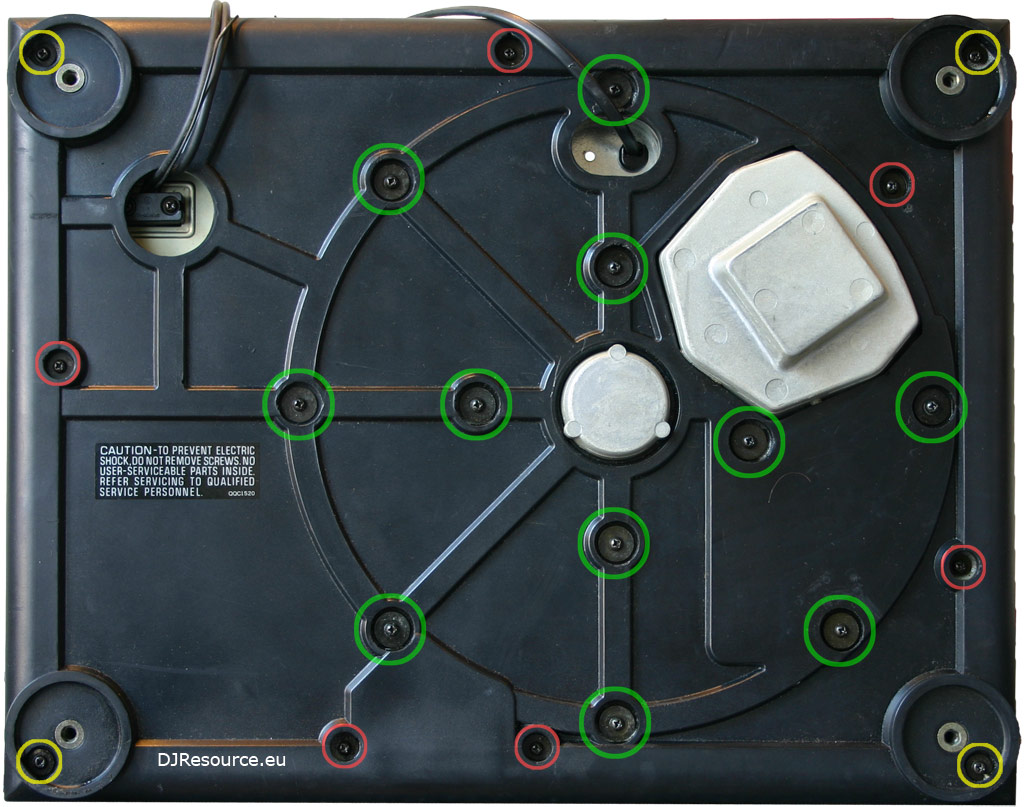
You need to remove the 4 feet first to gain access to the 4 longer screws that hold the corners firmly to the chassis.
After unscrewing ALL of them (21 screws) leave them in their place. This will make reassembly a lot easier. As there are 3 types of screws used sorting them again is a job that can be avoided.
This amount of screw is needed to make the body of the SL as heavy and solid as possible. All the mass weight reduces the effects of feedback and shock and improve stability.
Different internal design older models
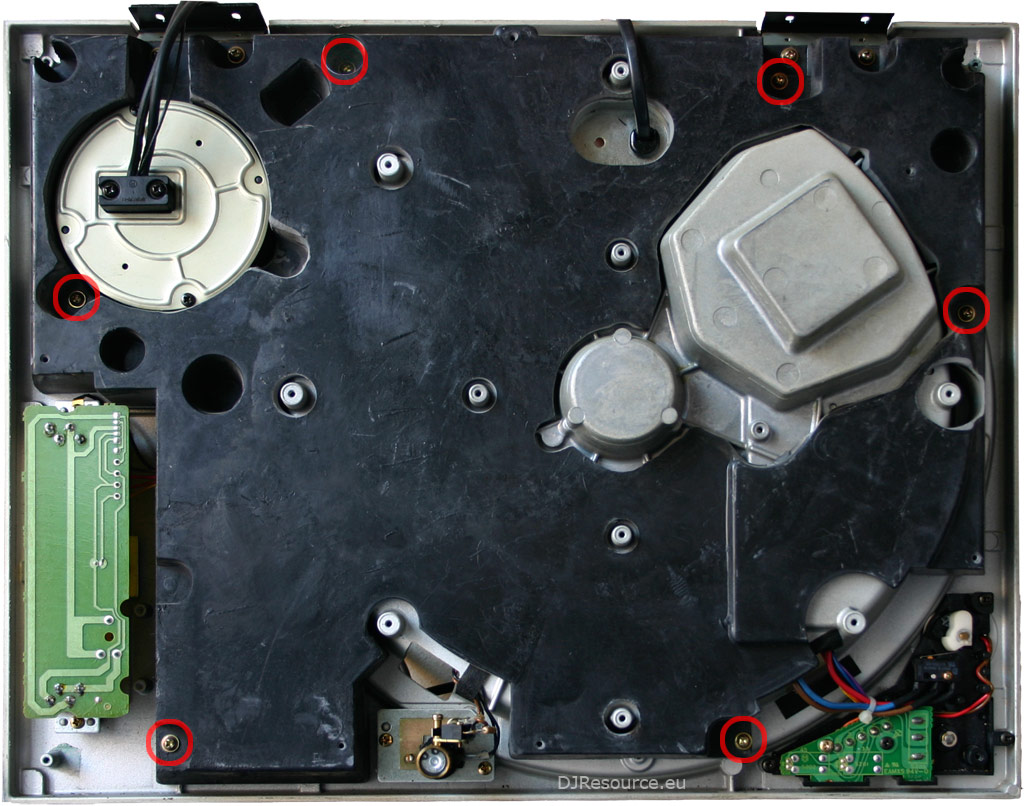
Depending on the building year of the Technics SL1200/1210MK2 the design of the base might be different. In the newer models (after around 1990) the base is re-designed so it holds all extra weight. In the older models there is a second cover that need to be removed before your can remove the complete Tone arm Assy.
This secondary cover only needs to be unscrewed when the Arm Assy needs to be removed and can be done by unscrewing 6 screws. You don't need to remove the 4 screws that hold the hinge to the base so leave those like they are. You might even consider to tighten them before you close up the SL again later.
You should now be able to do on the inside what you need to do like Replacing the signal wire.
What do you think about Technics SL - Opening the Hood ??
Please consider making this website possible by disabling your Ad Blocker.
Or become a Gold Member, they don't see ads.
Some parts of this website require you to login. Using an account on DJResource has a lot of advantages such as:
Adding Content, getting Notifications, Like content, Downloading and Uploading Images and much more.
Create your account to get involved with the Community
Most visitors online this month : 1.134
Lifetime Pageviews since 2003 : 245.813.962


